1. Check Your Laptop and Projector Ports
Before connecting, make sure you know which ports are available on your laptop and projector. The most common ports include:
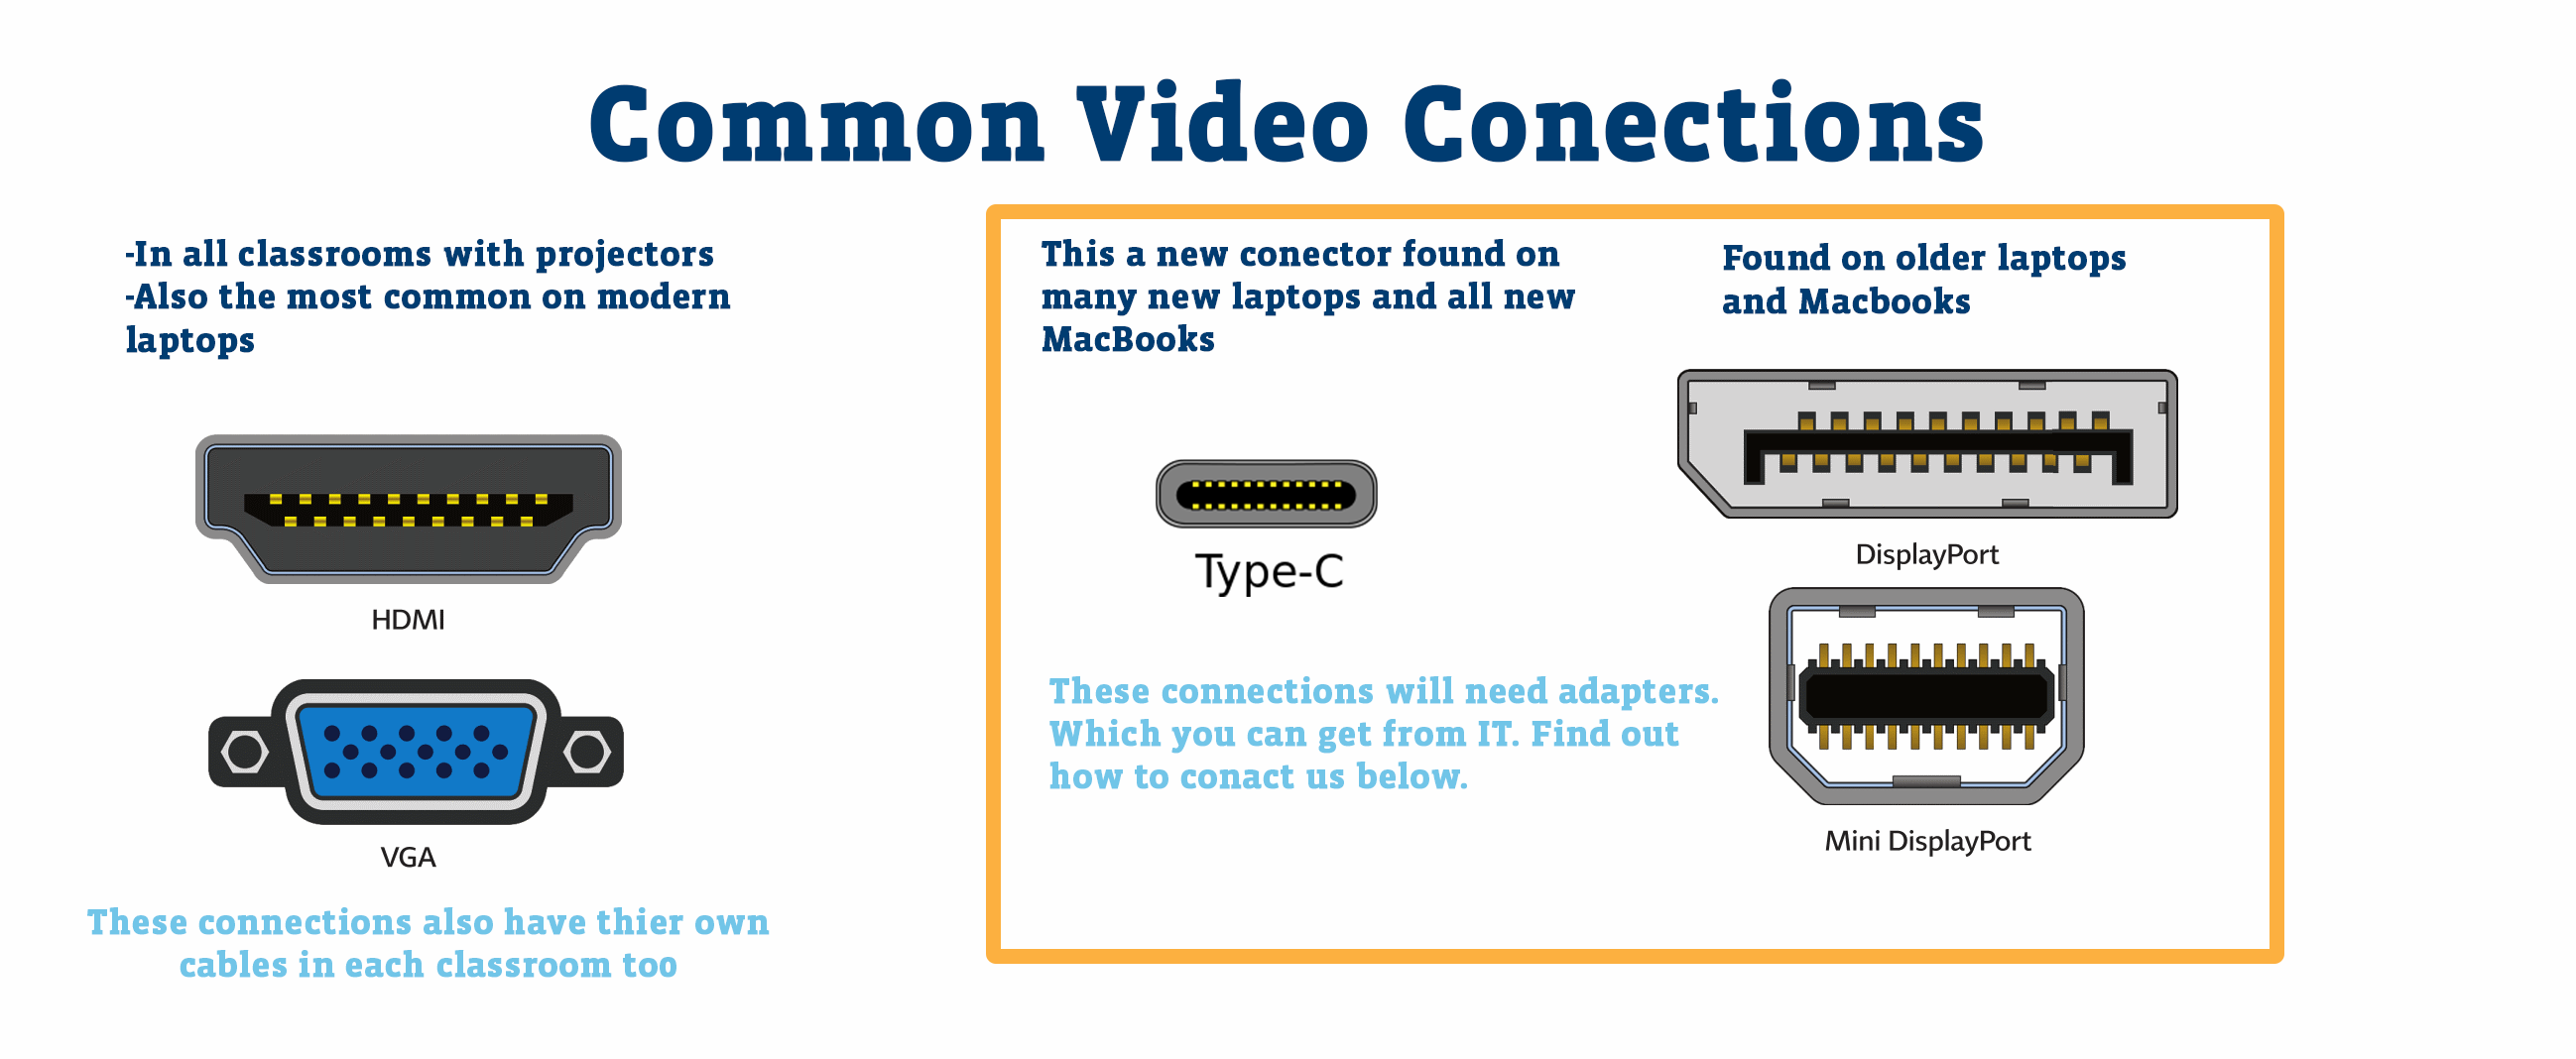
- HDMI: High-definition video and audio in one cable.
- VGA: Older video port, video only.
- USB-C / DisplayPort: Newer laptops may use these ports for video output.
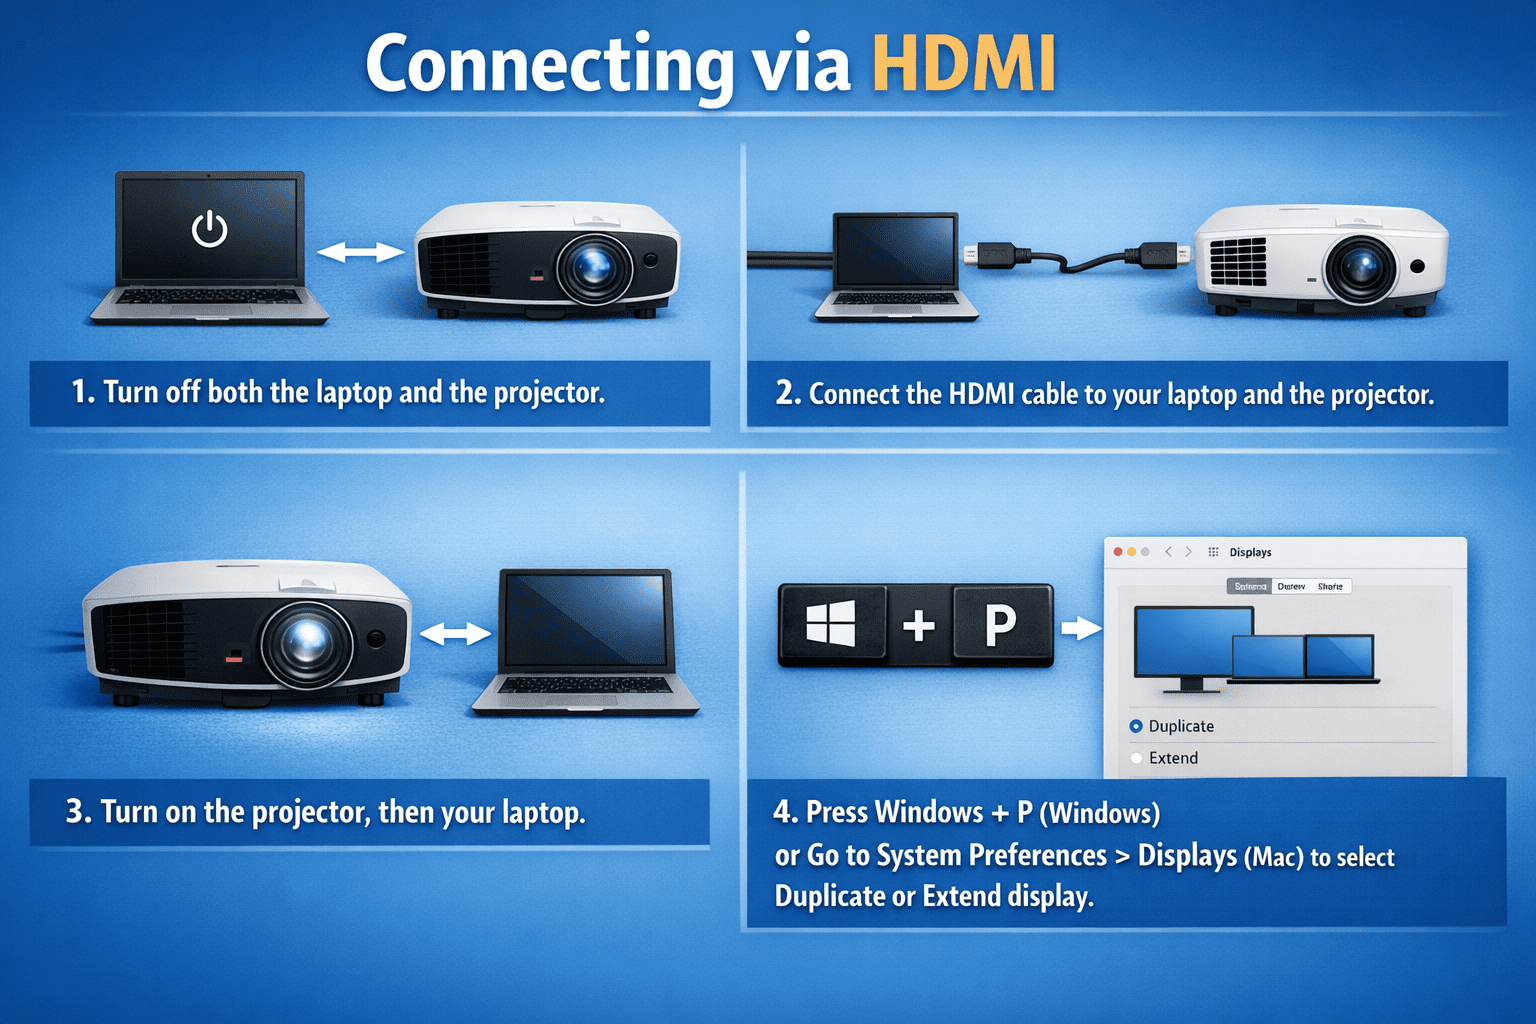
2. Connecting via HDMI
- Turn off both the laptop and the projector.
- Connect one end of the HDMI cable to your laptop and the other to the projector.
- Turn on the projector, then your laptop.
- Press Windows + P (Windows) or go to System Preferences > Displays (Mac) to select Duplicate or Extend display.
3. Connecting via VGA
- Connect the VGA cable from your laptop to the projector.
- If audio is needed, connect a separate 3.5mm audio cable.
- Turn on the projector and select the correct input source (VGA).
- Adjust display settings on your laptop.
4. Wireless Connection (Optional)
Many modern projectors support wireless connections via Wi-Fi, Miracast, or AirPlay. To connect wirelessly:
- Ensure your laptop and projector are on the same Wi-Fi network.
- Follow the projector’s instructions for wireless display.
- Use Windows Connect app or Mac AirPlay to project your screen.
5. Troubleshooting Common Issues
- No Signal: Check cables and input source on the projector.
- Incorrect Resolution: Adjust display resolution in your laptop settings.
- No Audio: Use HDMI for audio or connect separate audio cable for VGA.
- Projector Not Detected: Restart both devices and try again.
6. Tips for a Smooth Projection
- Use a high-quality HDMI cable for better video quality.
- Keep the projector firmware updated.
- Test the connection before meetings or presentations.
- Consider using a projector screen for better visibility.
FAQ
Can I connect my MacBook to a projector?
Yes, using HDMI, USB-C, or AirPlay depending on the projector model.
Do I need special software?
No, connecting via HDMI, VGA, or wireless usually works with built-in operating system tools.
Why is the projector not showing my screen?
Check cables, input source, and display settings. Sometimes restarting devices fixes detection issues.